티스토리 뷰
React Native - (2) 기본 문법, Styling, Third Party Packages, Flex Layout
우징어🦑 2022. 8. 15. 20:03Component
- 화면에 렌더링되는 것
- return () 내에 태그 형태로 작성됨
API
- 운영체제와 소통
- JS 코드로 작성됨
기본 App.js 코드
import { StatusBar } from 'expo-status-bar';
import { StyleSheet, Text, View } from 'react-native';

export default function App() {
  return (
    <View style={styles.container}>
      <Text style={styles.text}>Hello world!</Text>
      <StatusBar style="auto" />
    </View>
  );
}

const styles = StyleSheet.create({
  container: {
    flex: 1,
    backgroundColor: '#fff',
    alignItems: 'center',
    justifyContent: 'center',
  },
  text : {
    fontSize: 28,
    color: 'blue',
  }
});
div 대신 View
웹에 div태그가 있다면 RN에는 View 태그가 기본적으로 component를 정의할 때 쓰인다.
import { StyleSheet, Text, View } from 'react-native';import 후 화면에 보여질 부분을 View 태그로 감싸준다.
<View style={styles.container}>
  <Text style={styles.text}>Hello world!</Text>
  <StatusBar style="auto" />
</View>
텍스트는 Text 태그 안에 위치한다.
Styling
1. 위 예시처럼 StyleSheet.create() 를 통해 object를 정의하여 할당해주어도 되고
2. 아래 코드처럼 태그에 style 속성에 바로 적어주어도 된다.
<Text style={{
	fontSize: 24,
    color: 'red'
}>Hello world!</Text>
또 1번 방식에서 StyleSheet.create를 이용하지 않고 {} 를 통해 object를 선언해주어도 되는데, 이때 동작하긴 하지만 코드 편집기에서 키워드 자동완성이 지원되지 않기 때문에 생산성이 떨어진다.
Packages
import { StatusBar } from 'expo-status-bar';

...

<StatusBar style="auto" />
몇몇 component는 우리가 렌더링하는 것이 아니라 운영체제와 소통하는 용도로 존재한다.
StatusBar가 좋은 예시인데 시계, 배터리, wifi 등 상단에 위치한 상태표시줄이다.
StatusBar는 운영체제의 상태표시줄과 소통하는 것이다.
https://reactnative.dev/docs/statusbar
StatusBar · React Native
Component to control the app's status bar. The status bar is the zone, typically at the top of the screen, that displays the current time, Wi-Fi and cellular network information, battery level and/or other status icons.
reactnative.dev
예전 React Native에 있던 API, Component가 없어지는 이유
초반 RN은 모든 component를 지원하려 했지만 유지 관리와 업데이트가 힘들고 많은 버그 때문에 모든 component를 지원할 수 없었다.
그래서 지원하는 범위를 줄이고 필수적인 api, component들만 남기고 없앴다.
대신 community packages (reactnative.directory)를 통해 core components 외의 components들을 지원하고 있다.
Third Party Packages
community packages (reactnative.directory) 에는 수많은 thrid-party packages와 api들이 있다.
예전에는 공식 RN팀에서 지원하는 api, component들을 썼다면, 이제는 community에 있는 Packages, api들을 쓸 수 있게 되었다.
Expo SDK
Expo 팀 또한 자체적으로 Packages, API를 만들었는데, 이걸 Expo SDK라고 한다.
예를 들어 아래는 Expo에서 지원하는 StatusBar이다.
https://docs.expo.dev/versions/v46.0.0/sdk/status-bar/
StatusBar - Expo Documentation
Expo is an open-source platform for making universal native apps for Android, iOS, and the web with JavaScript and React.
docs.expo.dev
Layout System
https://reactnative.dev/docs/flexbox
Layout with Flexbox · React Native
A component can specify the layout of its children using the Flexbox algorithm. Flexbox is designed to provide a consistent layout on different screen sizes.
reactnative.dev
View는 이미 디폴트로 flex container이기 때문에 웹과 달리 display: flex를 속성으로 줄 필요가 없다.
또 flexDirection의 디폴트값 = column 이다.
<View>
  <View style={{width: 100, height:100, backgroundColor: 'red'}}></View>
  <View style={{width: 100, height:100, backgroundColor: 'blue'}}></View>
  <View style={{width: 100, height:100, backgroundColor: 'green'}}></View>
</View>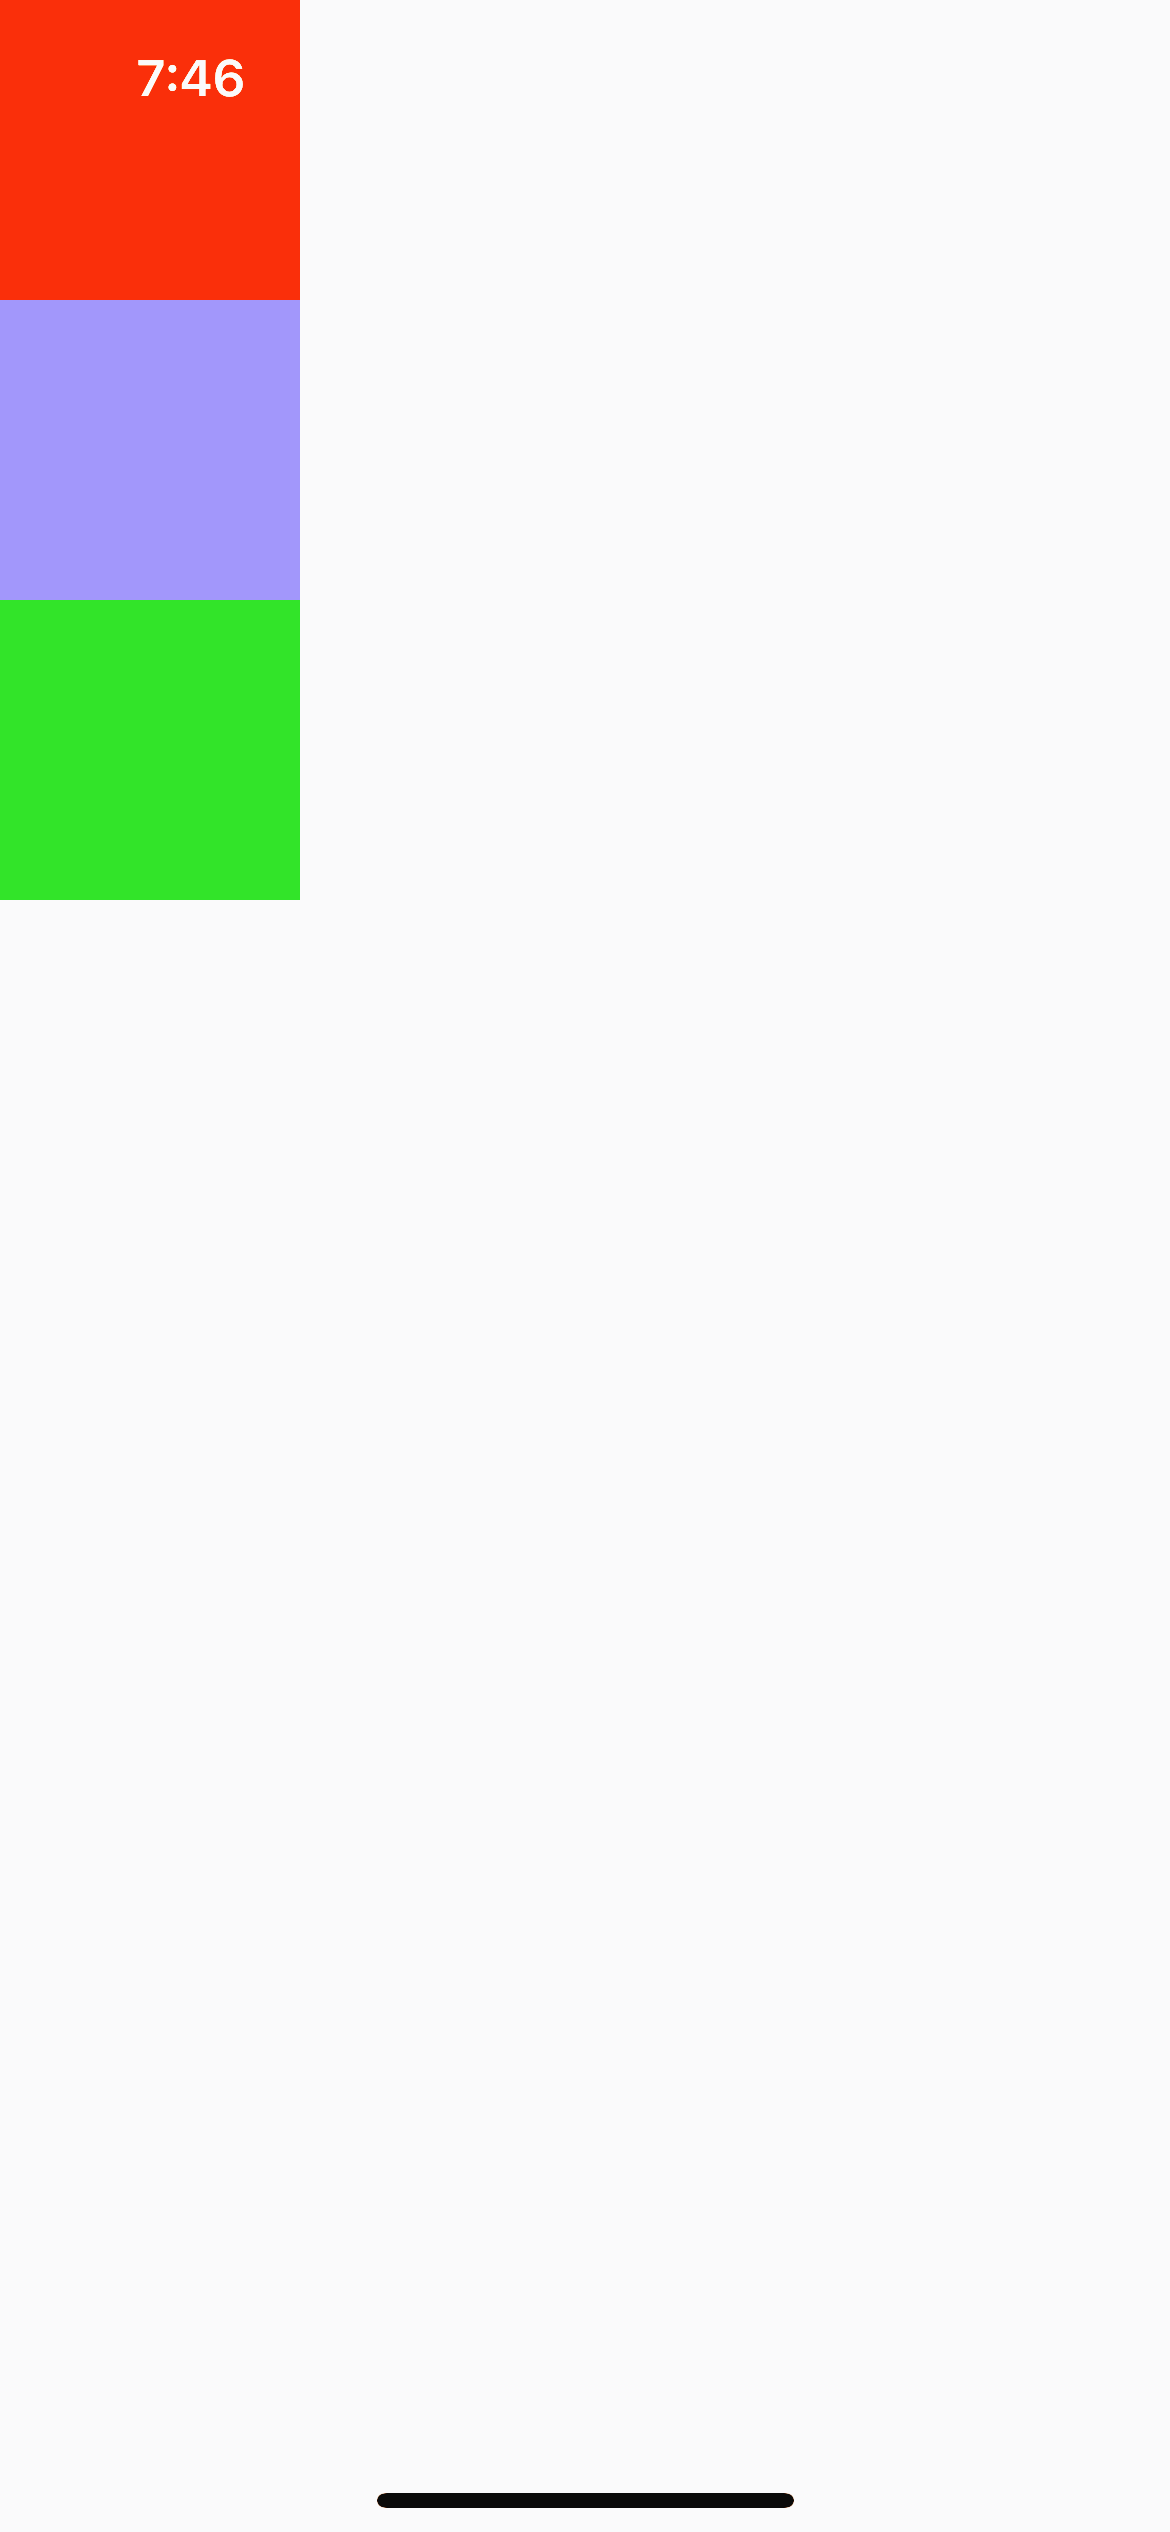
레이아웃을 짤 때는 스크린 크기에 따라 천차만별이기 때문에 위 코드처럼 width, height를 픽셀값으로 주지 않음.
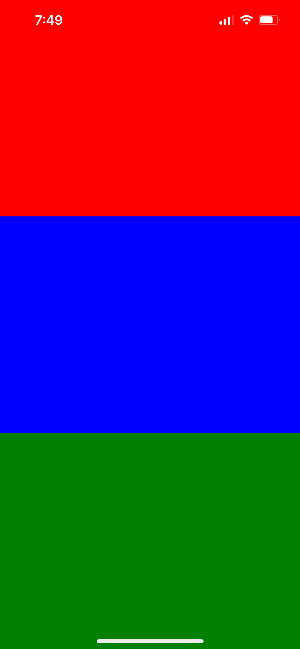
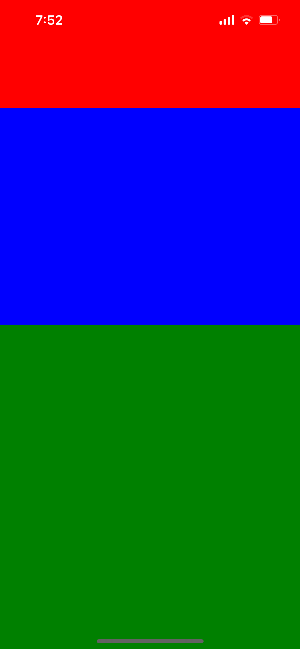
<View style={{ flex: 1 }}>
  <View style={{ flex: 1, backgroundColor: 'red'}}></View>
  <View style={{ flex: 1, backgroundColor: 'blue'}}></View>
  <View style={{ flex: 1, backgroundColor: 'green'}}></View>
</View>
flex: n 를 통해 비율로 표현
이때 부모 요소에 flex: n 속성을 줘야 자식 요소를 원하는 비율로 조정할 수 있다.
'프로그래밍 > React Native' 카테고리의 다른 글
| [React Native] ScrollView, FlatList 차이 (0) | 2022.08.28 |
|---|---|
| [React Native] Navigator - Screen 이동 (0) | 2022.08.23 |
| [m1 mac] React Native 개발 환경 구축 Xcode - 빌드 시 주의사항, 이슈 해결, 디바이스 시뮬레이터 돌리기 (0) | 2022.08.21 |
| [React Native 태그] Touchable 요소들, TextInput (0) | 2022.08.16 |
| React Native - (1) 작동원리, Expo 활용 개발, 설치 (Mac 기준) (0) | 2022.08.13 |
- Total
- Today
- Yesterday
- S3 403 forbidden
- 알고리즘
- partyrock사용볍
- 생성형AI
- S3배포
- SpacewBetween
- 코딩테스트
- 파이썬
- easycode
- partyrock무료
- 술자리병돌리기게임
- ChatGPT
- BOJ
- 정적 웹페이지 배포
- genaiapp
- aws생성형ai
- awsgenai
- partyrock앱
- 백준
- 정적 웹사이트 배포
- vscode easycode
- 오블완
- partyrock
- partyrock생성
- 병돌리기구현
- PYTHON
- easycode chatGPT
- 티스토리챌린지
- React native 작동 원리
- AWSBedrock
| 일 | 월 | 화 | 수 | 목 | 금 | 토 |
|---|---|---|---|---|---|---|
| 1 | 2 | 3 | 4 | 5 | ||
| 6 | 7 | 8 | 9 | 10 | 11 | 12 |
| 13 | 14 | 15 | 16 | 17 | 18 | 19 |
| 20 | 21 | 22 | 23 | 24 | 25 | 26 |
| 27 | 28 | 29 | 30 |